
Previously: Customizing the Menu. Part of a series of tutorials on using WebCommons.
(Before doing this, you need to login. If you haven’t, go back and do that first.)
By now, you’ve probably noticed there is a static part of your website that occupies the right side of each page. This is called the Sidebar, and the things in it are creatively called “Widgets.”
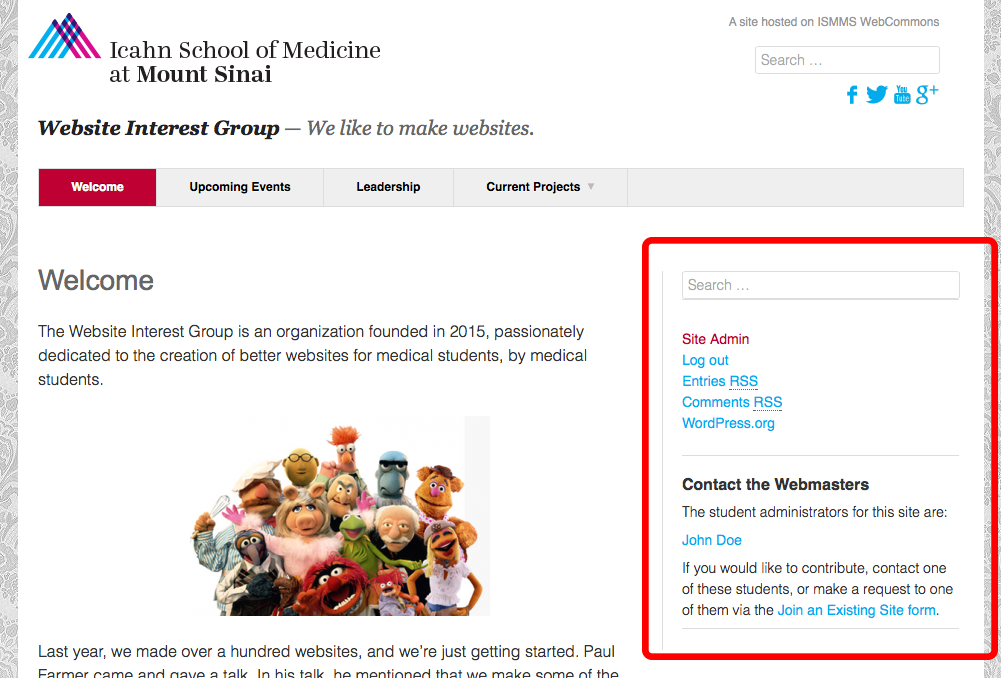
Although we’ve set some default items to appear here: a search bar, links to log in and out, and a Contact the Webmasters widget which lists all the administrators for the site, you have the freedom to edit basically anything that should show up here. Note that whatever you set will appear on all pages.
![]() To get started, you want to return to the Customize panel. Do you remember how to do this from the earlier tutorial? (Either click the Customize button while logged in and viewing the homepage of your site; or, from the left-hand sidebar of your Dashboard, go to Appearance > Customize.)
To get started, you want to return to the Customize panel. Do you remember how to do this from the earlier tutorial? (Either click the Customize button while logged in and viewing the homepage of your site; or, from the left-hand sidebar of your Dashboard, go to Appearance > Customize.)
Once you’re looking at the Customize panel, go to Widgets > Sidebar. You should now be looking at a tool for changing up the widgets in your sidebar.
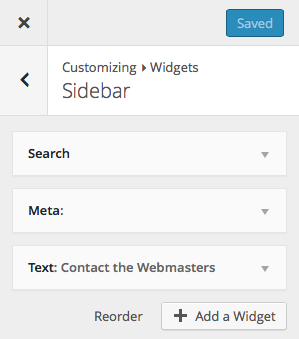
To add things to the sidebar, click Add a Widget. There are many options, so we won’t cover all of them here. The basic ones that you already have are Search, Meta (the login/logout links) and Text. Text is the most basic: it is just static text that can say whatever you want. This is useful for adding links to frequently accessed content from the same place on every page.
You can reorder widgets by dragging them around, or you can click the Reorder link to display clickable controls for doing the same.
To edit widget options after they have been added, you can use the dropdown arrow on the righthand side of each one. Here, we are editing the default Text widget for “Contact the Webmasters.” The content here is written in HTML, which is a computer language for formatting webpages (unfortunately, the basic Text widget has no rich text editor). You can also see a WordPress Shortcode in square brackets to list all administrator users for your website—that is an advanced topic that we’ll cover later.
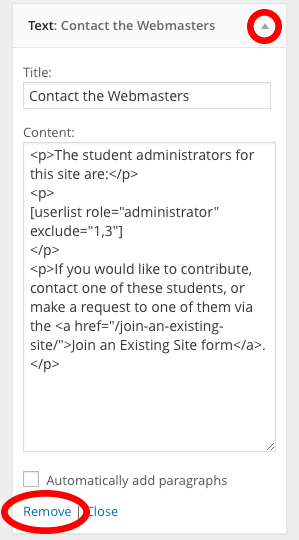
Note that you can also remove widgets from this screen with the Remove link. Be warned that this change is permanent and you can’t recovered deleted widgets—unlike deleted posts or pages, which go into the Trash before they are permanently deleted.
Also, generally speaking. we recommend that you keep the “Contact the Webmasters” widget, otherwise other students that come across your webpage (perhaps in a couple years, after you’ve forgotten you made it) won’t know who to contact to take ownership and bring it back up to date.
Saving your changes
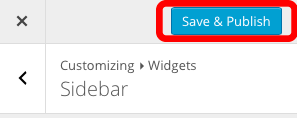
Although as you make changes to your widgets they are automatically reflected in the preview of your website to the right, you must save them by clicking the blue Save & Publish button when you are finished. Otherwise, your changes are discarded.
Now, you know how to edit basically all the visible parts of your website. Awesome work!
Since you are starting to become a WordPress power user, you might be tempted to create snippets of content to be published more often, which is better suited to the Post content type (associated with publication dates, like traditional blog posts). We’ll cover how to work with Posts next.
Next: Creating Posts.