
Previously: How to log in. Part of a series of tutorials on using WebCommons.
Congratulations, you’ve logged into WebCommons! (If you haven’t, go back and do that first.) So now what can you do?
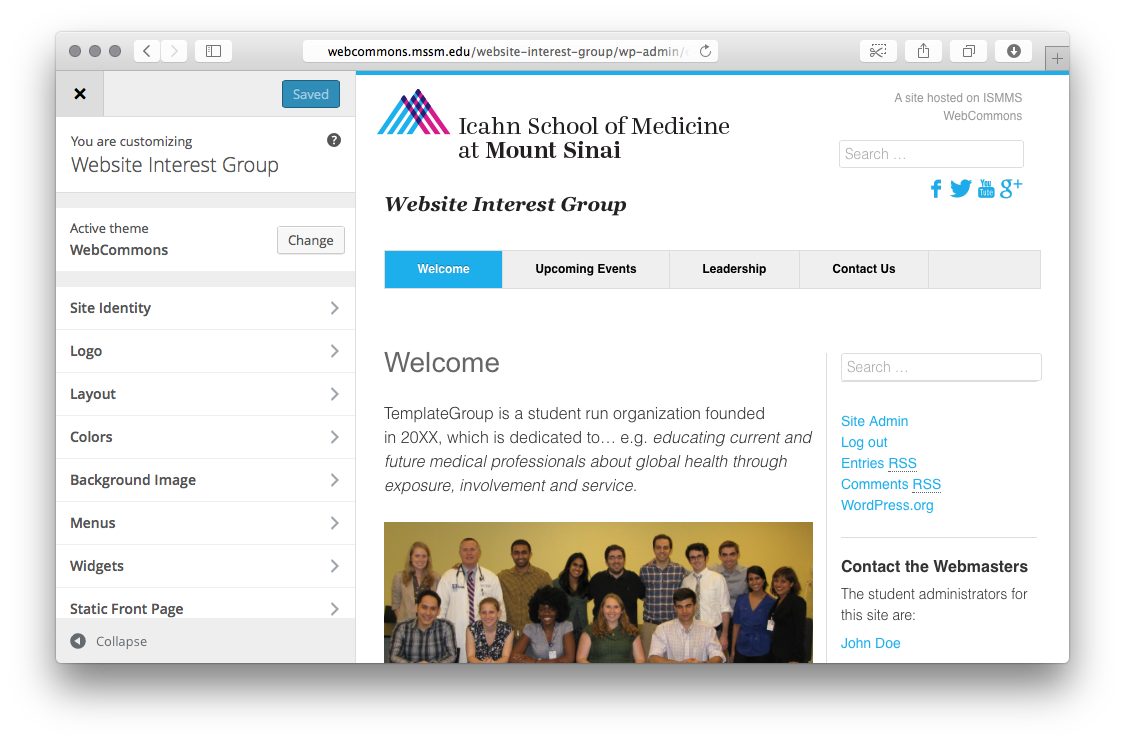
The Dashboard
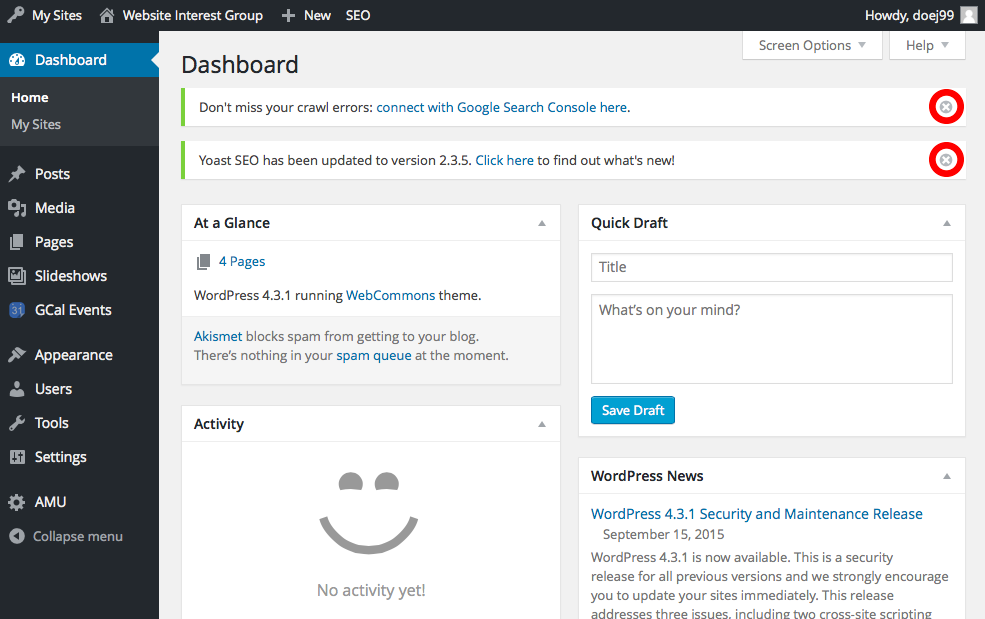
This is the first thing you see when logging in. Occasionally, notifications will appear here when you login; dismiss them with the X buttons circled in red.
Let’s get you oriented. One basic concept up front: WordPress has two elementary types of content, posts and pages. Pages are meant to be the more permanent content of your site: things that rarely change, like an About or Contact page. Posts are intended to be relevant for some short period of time, and are meant to flow in the typical stream of dated content you see on a blog. Most WebCommons sites are entirely pages and have no posts, but there are a couple exceptions, typically sites meant to be written incrementally over time.
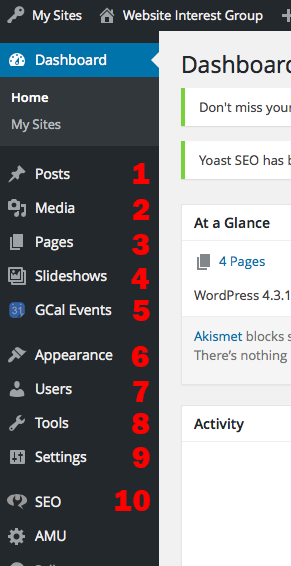 Most of the things you’ll need as a website designer are on the left sidebar. Going right down the side, let’s learn where things are:
- Posts: This is where you create and edit posts (content most relevant for some short period of time).
- Media: You can upload and manage photos, video, music, and audio that you want to include on your site.
- Pages: This where you create and edit pages, which are the permanent fixtures of your site.
- Slideshows: You can create sets of media that will display in slideshows on your pages or posts.
- GCal Events: If you have a Google Calendar, you can link it into your site here.
- Appearance: Change the menus and sidebars and customize the theme of your site.
- Users: See and change who can edit and administer the site.
- Tools: You shouldn’t need this unless you are importing or exporting content.
- Settings: Set the title, tagline, and other basic information about the site.
- SEO: This is for power users and we will not cover it here, but it allows you to control how your site appears in Google results.
Seeing what your site looks like
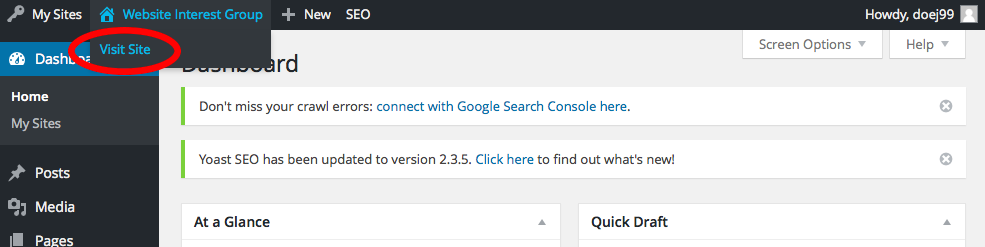
When you’re in the dashboard, you can go back to your actual site by going to your website name in the top bar, and clicking Visit Site.
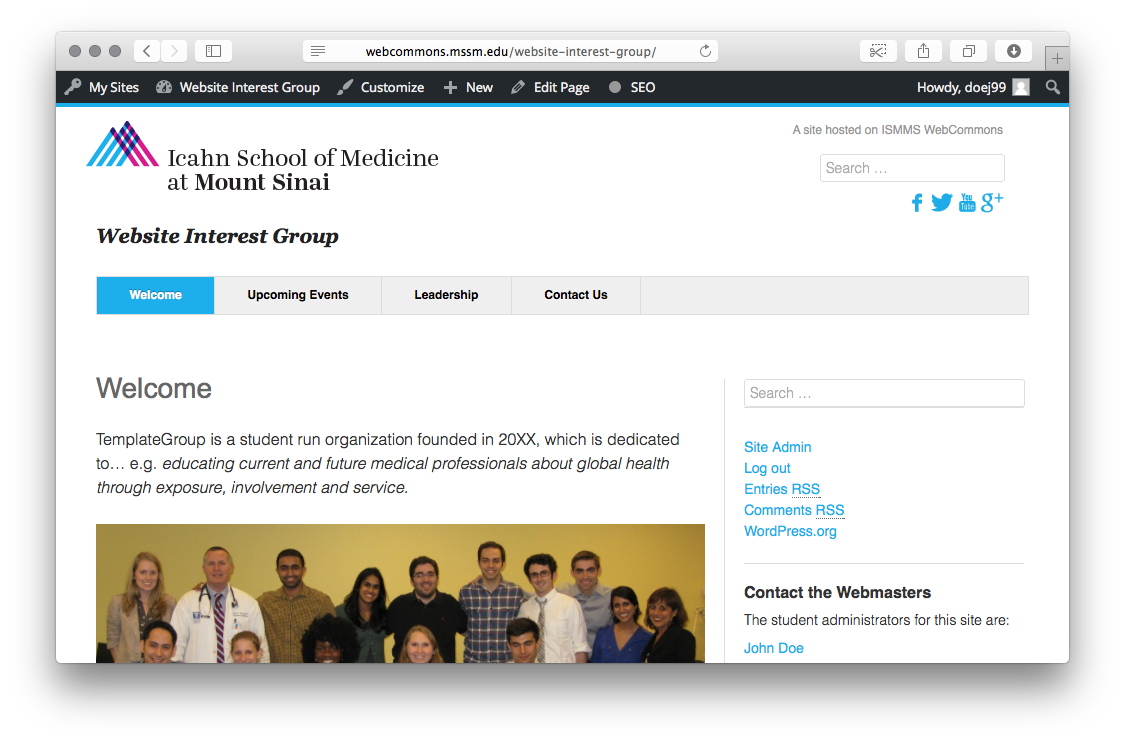
You’re now looking at what your site looks like, which just contains some template content that we provide for new groups to give them an idea of what they can do with their site. Note that the URL for your new website (which you can give out via email, etc.) is in the address bar. For the purposes of this tutorial, we’re making a site for the “Website Interest Group,” which is an extremely hypothetical group of students that just really likes making websites.
Changing basic settings
![]() The first thing you probably want to do is set up basic stuff like the site title, the colors, the links at the top of the page, the stuff in the sidebar, and so on. To get started on that, click the Customize link in the header bar. You can also get to this page by accessing Appearance > Customize in the sidebar of the Dashboard.
The first thing you probably want to do is set up basic stuff like the site title, the colors, the links at the top of the page, the stuff in the sidebar, and so on. To get started on that, click the Customize link in the header bar. You can also get to this page by accessing Appearance > Customize in the sidebar of the Dashboard.
You’ll now be looking at a control panel where you tweak various parts of the appearance.
So what can you do here? Under Site Identity, you might want to change the default site title and tagline as preset by ASCIT. As you do this, the preview on the right side will update:
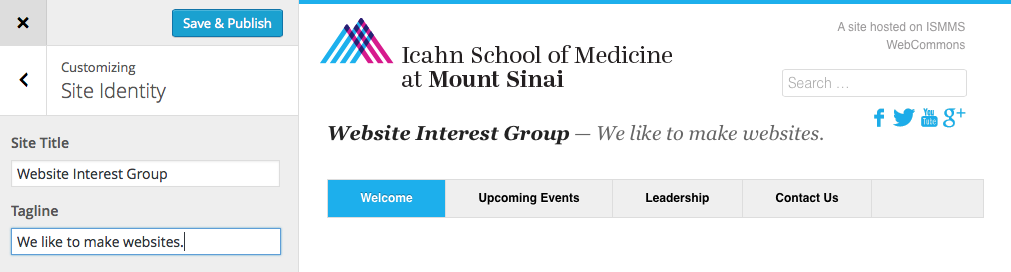
Be sure to click Save & Publish after you make changes, so they are applied to the real website.
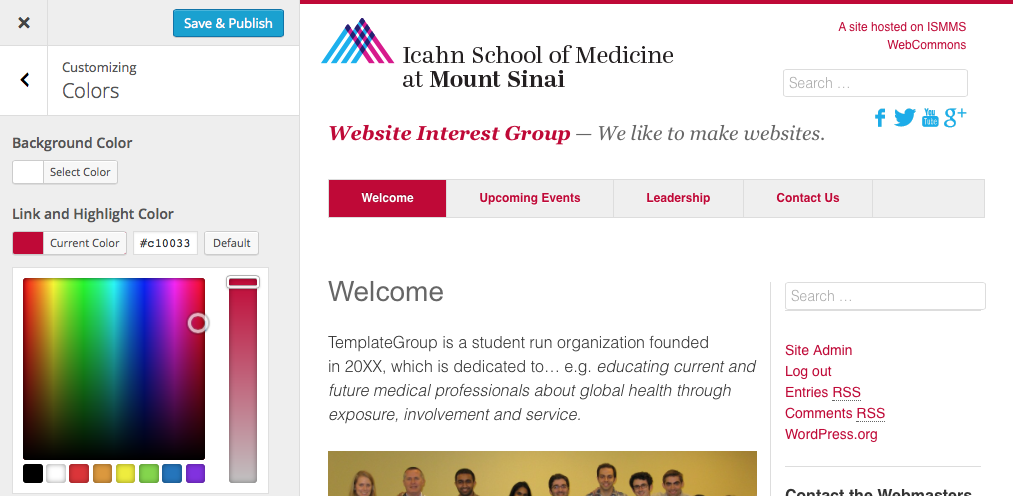
As of now, changing the Logo or Layout doesn’t do anything (the theme doesn’t allow it). You can, however, change the Colors, which will effect everywhere that the light blue highlight color is applied:
You can also set a Background image, which can tile. Say for instance, we wanted a classy patterned background to match our classy red scheme:
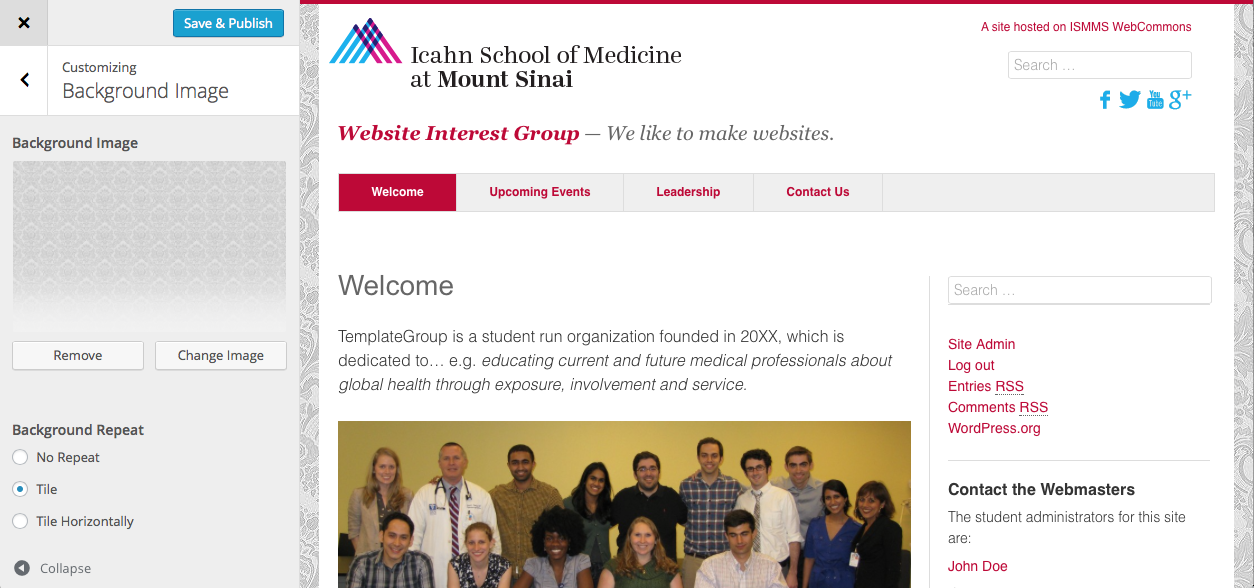
Note that this only affects the periphery of the pages, and you will need to adjust the other options, like whether the background tiles, in what direction, and the background color to get optimal results. For our example above, we’ve decided to only allow tiling in the horizontal direction, and we adjusted the background color so that as the image fades out vertically, it blends into the background color.
At this point, we could customize the header links or the sidebar, but before we do that, we will covering editing the placeholder content on the four default pages of the template.
Next: Editing Existing Pages.